I decided to try something new on my blog and I'm super excited about it! If you couldn't tell by now, I LOVE creating projects for children to do hands on (let's be honest it's all I talk about!). With so many talented and creative teachers out there I thought a weekly Linky Party would be a fun way to share crafts, projects, and basically anything that allows students to learn while being creative. To get this party started I created this cute "Crafty Collaborators" button!
To join me in this linky party follow these 4 steps:
1. Write a post on your blog related to the linky party (Teachers feel free to write about paid or free products just be sure to show off your creative skills!)
2. Link up at the bottom of this post using the linky tool.
3. Grab the "Crafty Collaborators" Button and add it to your blog post.
4. Link the button back to this post!
And now without further ado....Here is the first Crafty Collaborators Blog Post! Since it's back to school time I went theme related and chose my "Label an Apple Craftivity." I just loved how this one turned out so let me share it with you :)
To make this craftivity easy for anyone, patterns like this are included in my "Label an Apple Craftivity." All you need to do is copy them onto construction paper.
Like this!
Or you can copy the patterns onto card stock, cut them out, and have the students trace them themselves!
Next thing I did was cut out the pieces. You will need 2 apple patterns, a core, leaf, stem, and 3 seeds. As you start cutting be sure to talk with your students about the different parts of an apple and what they look like. You can even take a real apple and cut it in half and show students the parts that way. Lots of fun!
Before you start gluing I like to flip all my pieces over so any leftover black lines won't show. Let's start gluing. First I glued the apple patterns on top of the core like this with one at the top and one at the bottom.
Then I glued the stem and leaf behind the top of the apple.
Next I glued the 3 seeds on top of the core. If you want you can stop here and just leave it as an apple core cut and paste or you can continue...
By handing out these labels and...
Having your students cut them out.
Then have your students label the different parts of the apple and if students finish early they can...
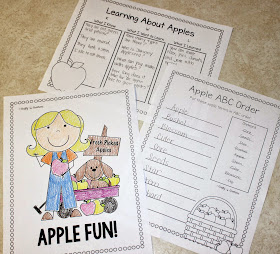
Work on any of these (There are even more included in the craftivity!)! And that's that! You've now created some great apple theme room or bulletin board décor and learned about the apple parts at the same time :) Hope you had fun and for all my teacher blogger friends out there be sure to link up and join me on this new linky party! Just grab the Crafty Collaborators Button and link back to this post.
If you are interest in this adorable project you can find it here:


Your apple craft is so cute! I can't wait for apple season to start :)
ReplyDeleteThanks so much sharing! I can not wait to add this to my curriculum.
ReplyDelete